310-324-6611
GVJCI
  • Izakaya
  • Seniors
    • Bento Program
    • Smartphone/Tablet Class
    • TNK Classes
    • Tomo Cafe | 友カフェ
  • Events/Programs
    • Upcoming Events
    • Japanese Language School >
      • JLS Graduates
    • The Bridge: GVJCI Heritage Center
    • Day Of Remembrance >
      • DOR 2023
    • Meditation & More Class
    • GVJCI Scholarship
    • 2023 Matsuri Fundraiser
    • TANOSHII Fun Camp >
      • Camper Registration
      • Counselor Registration
      • Testimonials
      • Camp Supporters
      • Activities
      • FAQ
    • Past Events
  • Organizations
    • Bando Hidesomi
    • Boy Scout Troop 683
    • Boy Scout Troop 719
    • Evening Optimist Club of Gardena
    • Gardena JCI Kendo
    • Gardena Judo Club
    • Gardena Kendo
    • Gardena Naginata
    • Hawaiian Music Class
    • Kyudo Renmei
    • LA Men's Glee Club
    • Meito Calligraphy
    • Sansei Baseball League
    • South Bay F.O.R Junior Sports Association
    • South Bay Youth Basketball
    • Taiko
  • Support Us
    • Become a Friend of the GVJCI
    • 2023 GVJCI Raffle Drawing
    • Become a Bento Buddy
    • Donate Your Car
    • Shop on Amazon
    • Purchase a 2023 Calendar Ad
    • Volunteer
  • Reserve our Facilities
  • Donate

GVJCI Blog
ガーデナ平原日本文化会館ブログ

Learn How to Make Your Own Kawaii Origami Paper Doll!

6/29/2017

0 Comments

 
By Ha Eun (Lina) Kwon, GVJCI Social Media and Community Outreach Intern
Picture

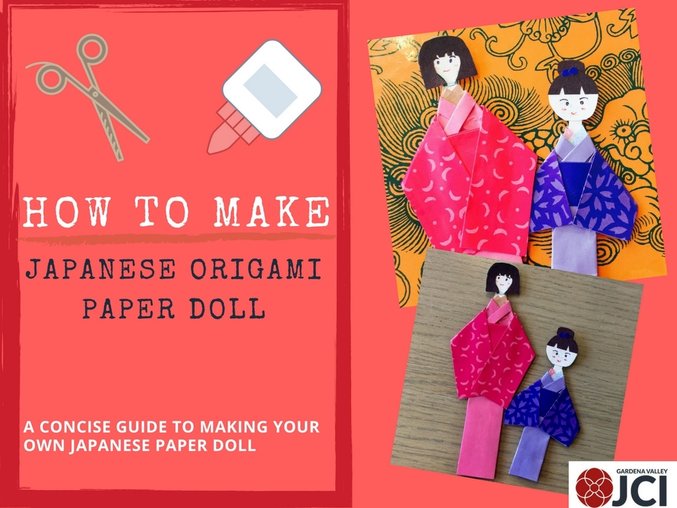
​Hello everyone! Today I would like to share this super cute and simple craft that you can make with your friends and family. These pretty origami dolls are wearing a Kimono inspired outfit made out of patterned origami p
aper! They are perfect gifts for many occasions such as birthdays, Valentine's Day, Mother's Day, Hinamatsuri, anniversaries and even weddings. Make your card stand out on these occasions by using origami dolls and show your sincerity! All you need to do is attach them to the front of your cards and decorate them. They can also be used as bookmarks or as paper puppets by taping a stick onto the back of the puppets.


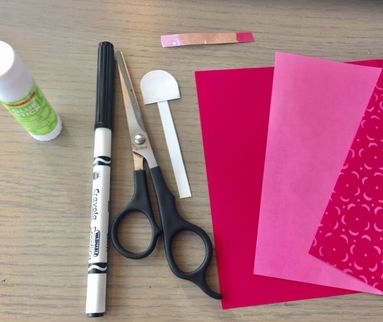
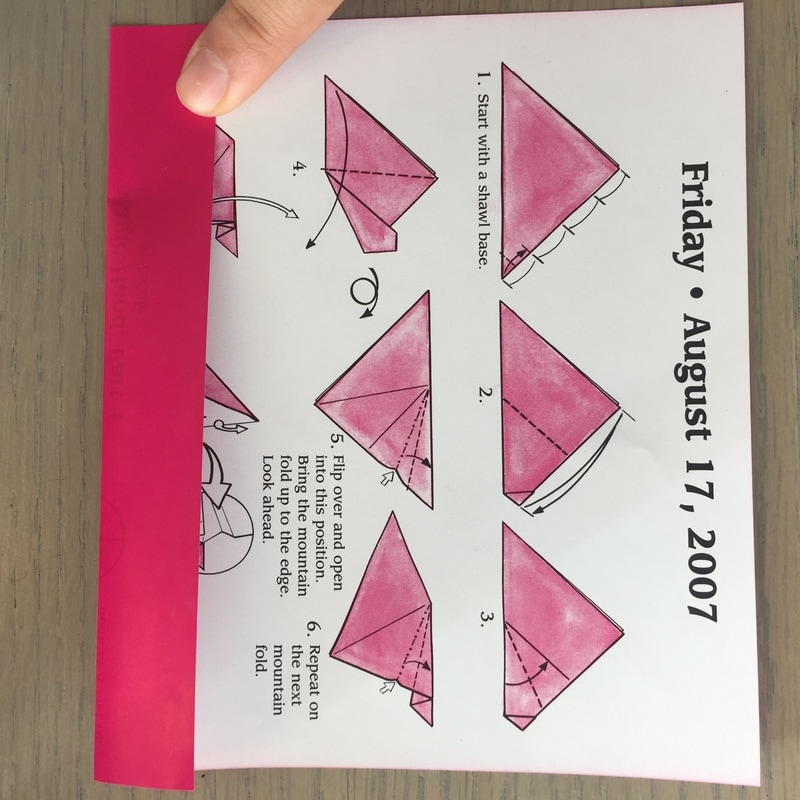
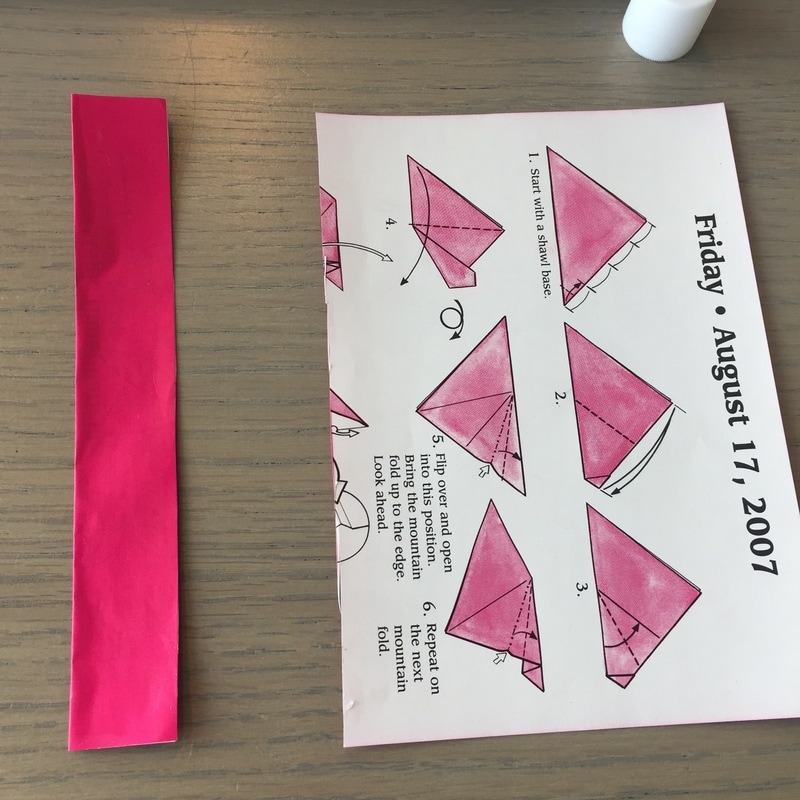
If you can get some origami paper in hand that has one or two colors or a pattern, it gives the dress a simple two toned effect. For the head, you need to cut out a white cardboard to make a round head and a stick-straight body.  You'll need 3 sheets of square origami paper for the kimono. Now, shall we get started?
Picture
Picture

​Instructions:


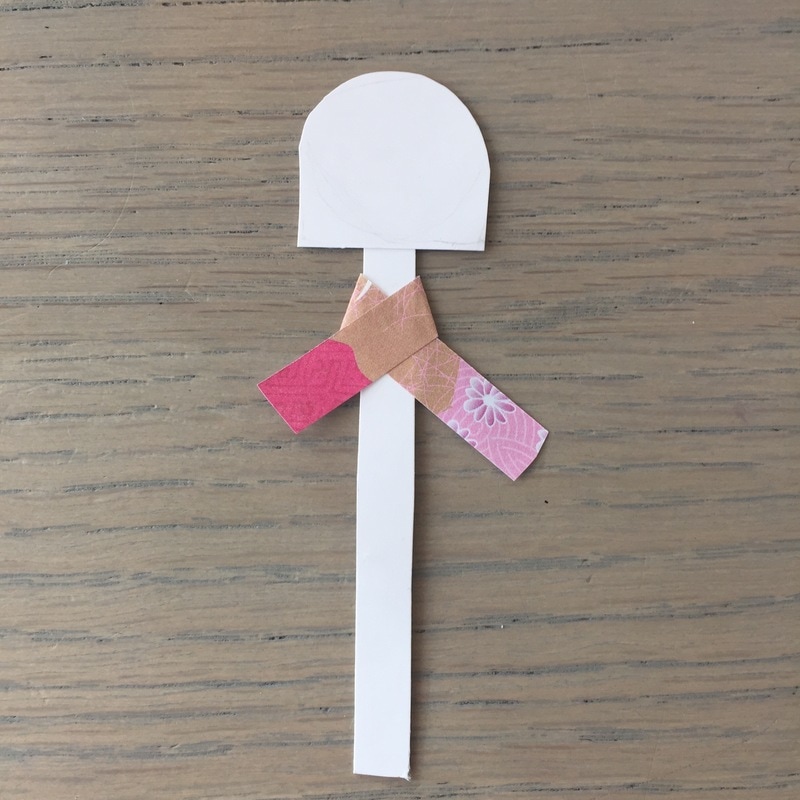
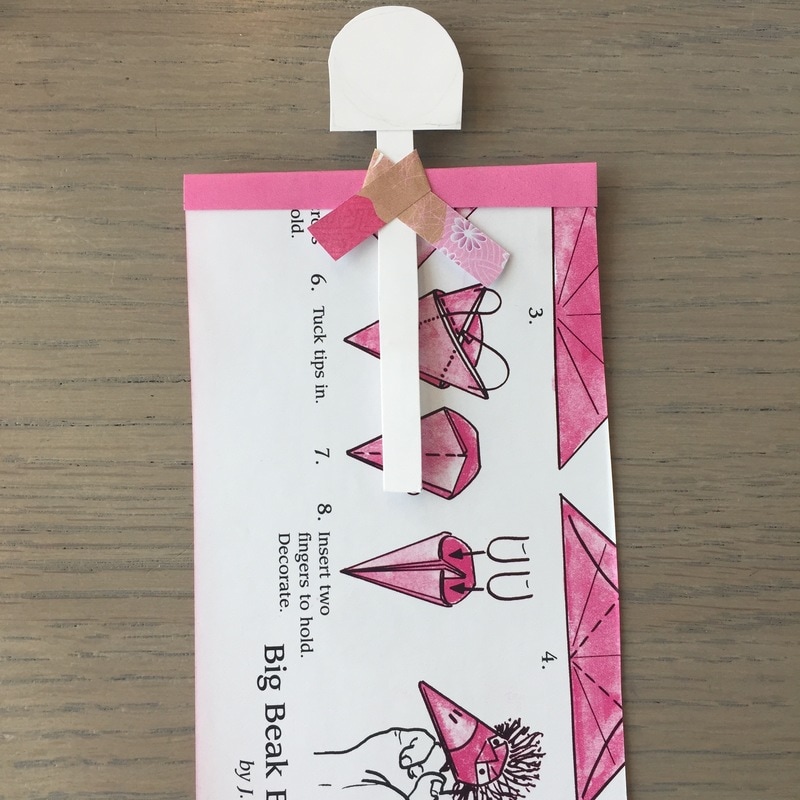
​Step 1:  Glue the stick body onto the back of the head and place the collar piece on the back of the girl's neck about halfway, so that it has even lengths each side.  Glue the folded collar piece. Then, fold the even lengths of the collar piece to form a V shape, as shown in the image.
Picture
Picture

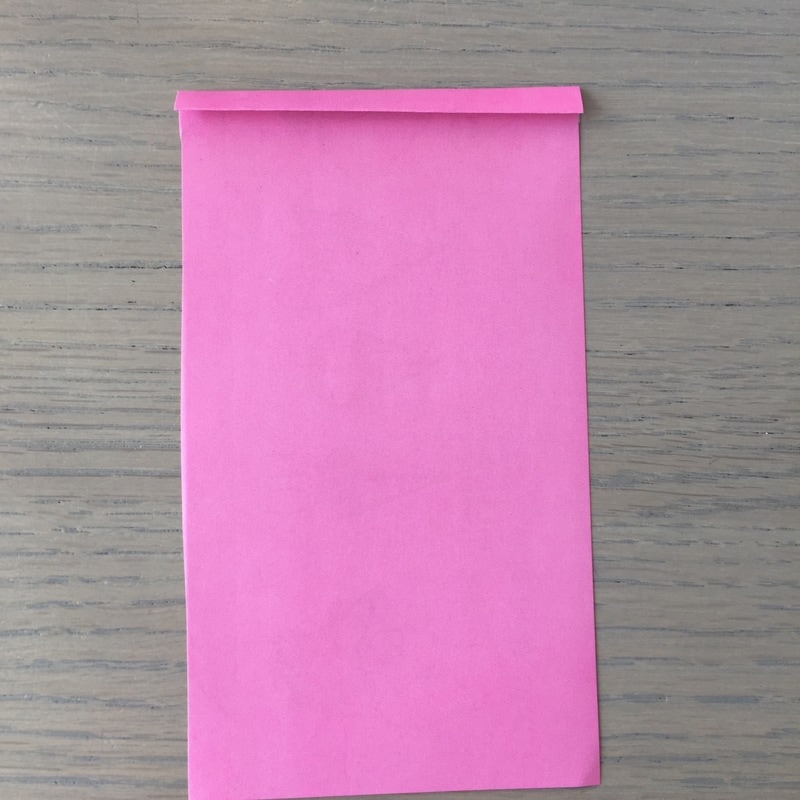
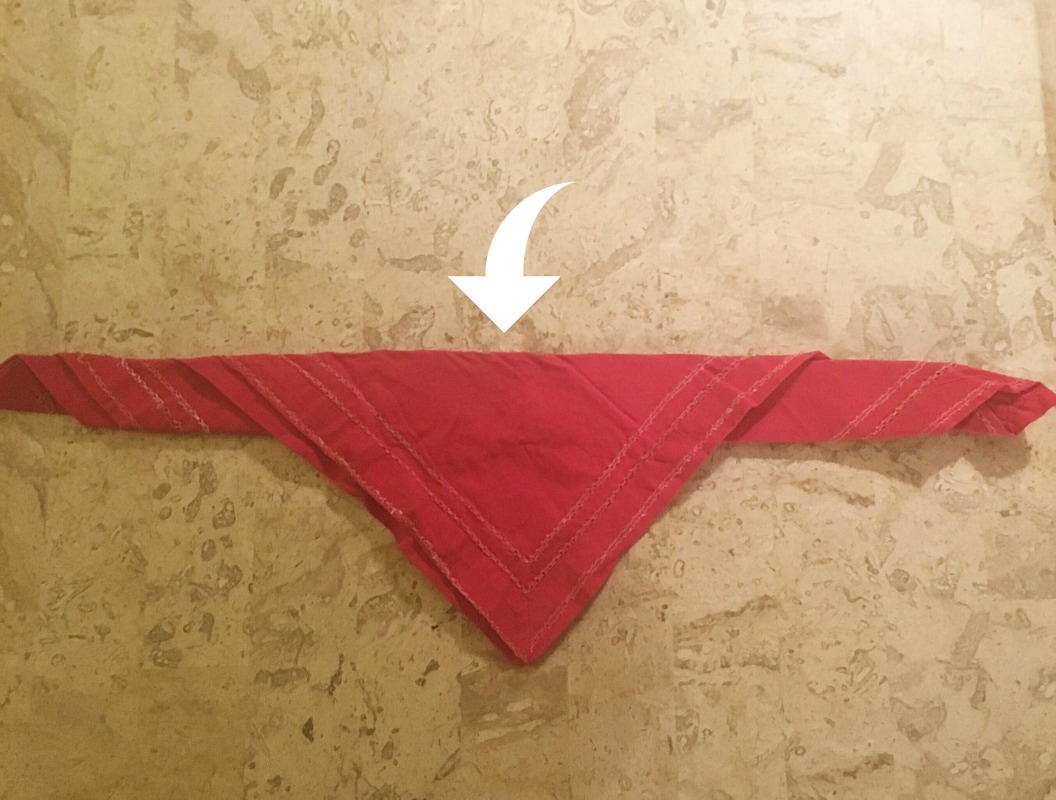
​Step 2: Start preparing the kimono. Cut your first solid color origami paper in half and fold the top edge (1 cm). Flip the paper over and fold it halfway down, towards the end of the folded edge.
Picture
Picture

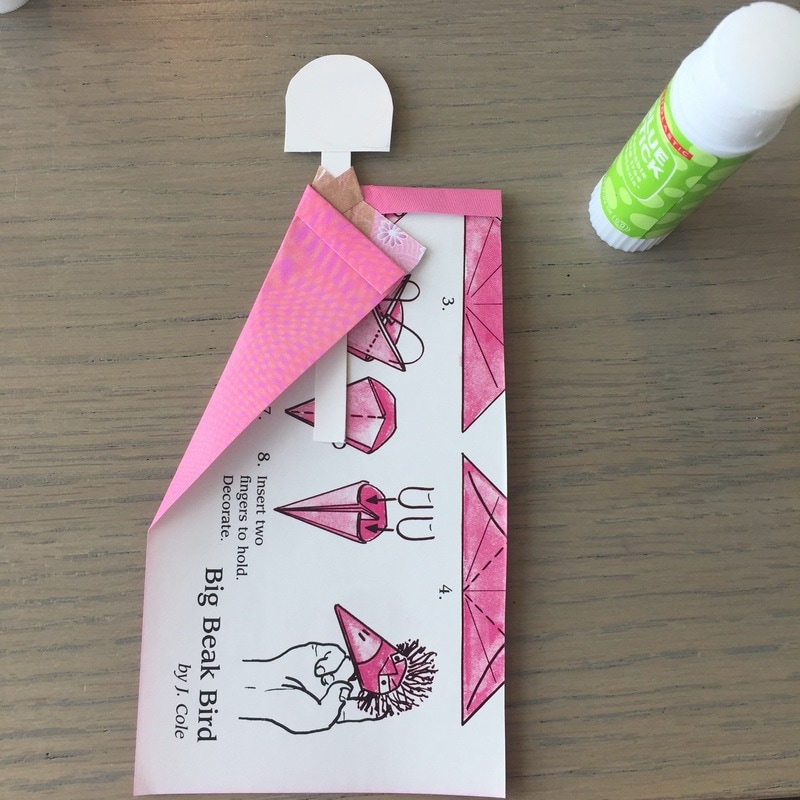
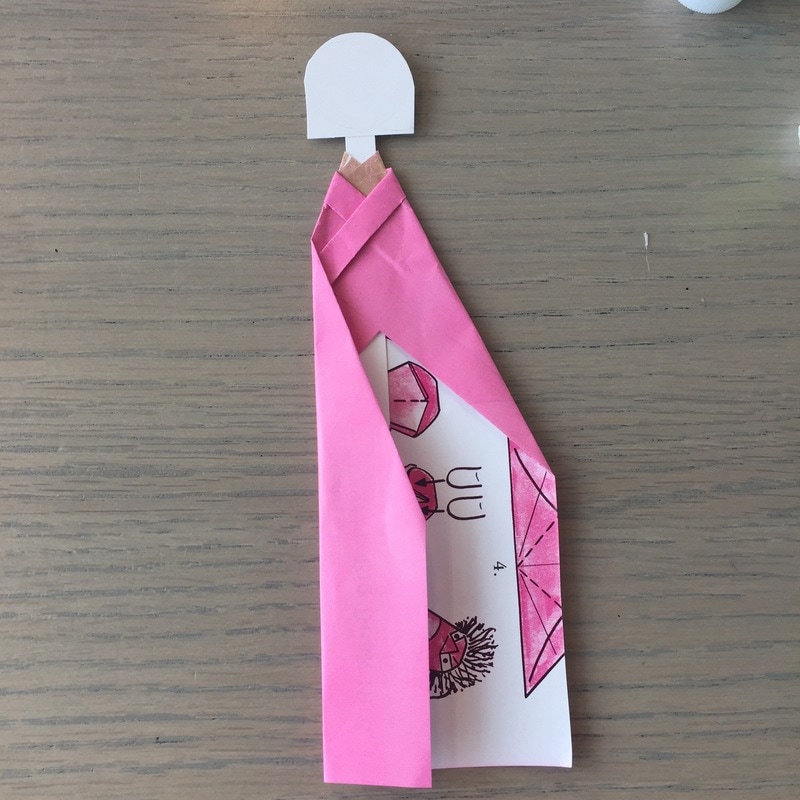
​Step 3: Place the girl in place and fold the top corner of the kimono over to form a V shape, as shown in the image. Fold the other top side the same way to complete the shoulder zone. Make sure that the other collar piece you've already attached is still showing above the kimono collar. 
​

One thing to note here is that 
kimono is ALWAYS worn left over right, with the exception only of in death. Why must this rule be followed? In Japan, female corpses are usually dressed up in Kimono with the right side covering the left side. The corpse is purposely designed to dress this way to indicate that the person is already dead. Therefore, if you don’t want to be mistaken as the walking dead, the right collar of your kimono should always come underneath the left.
Picture
Picture
Picture

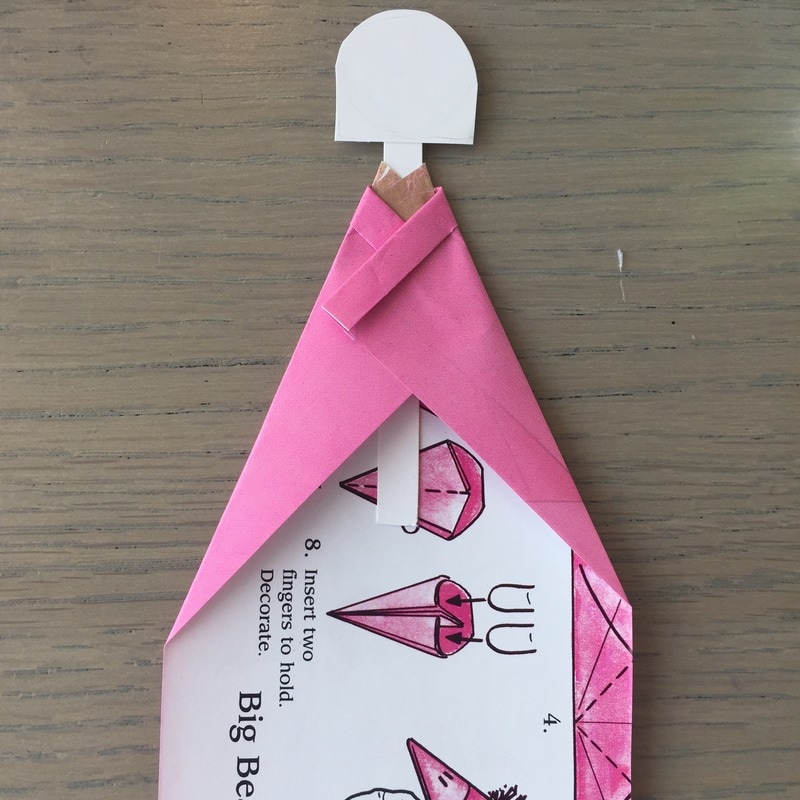
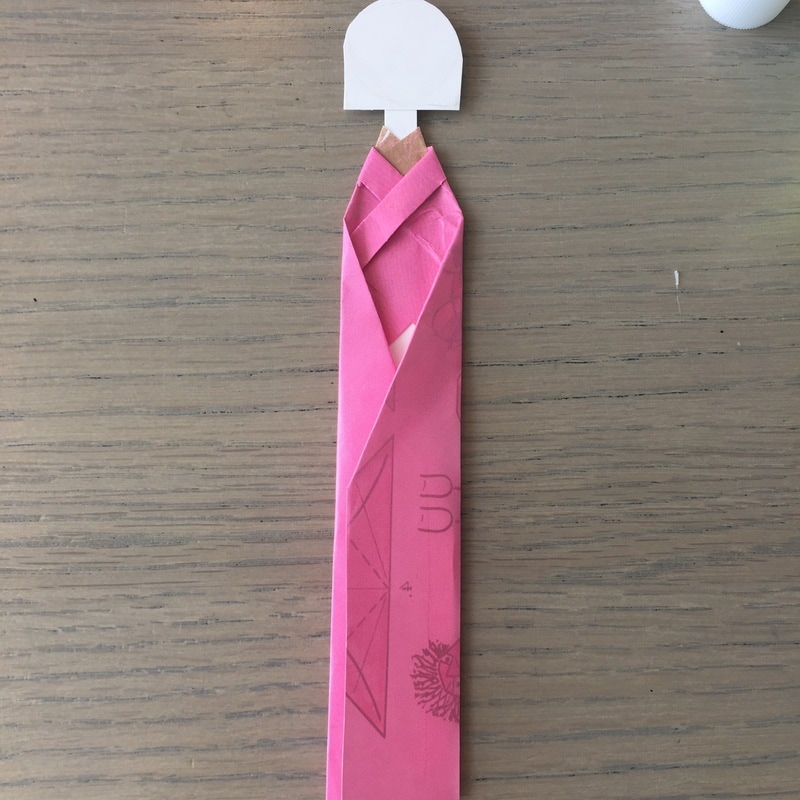
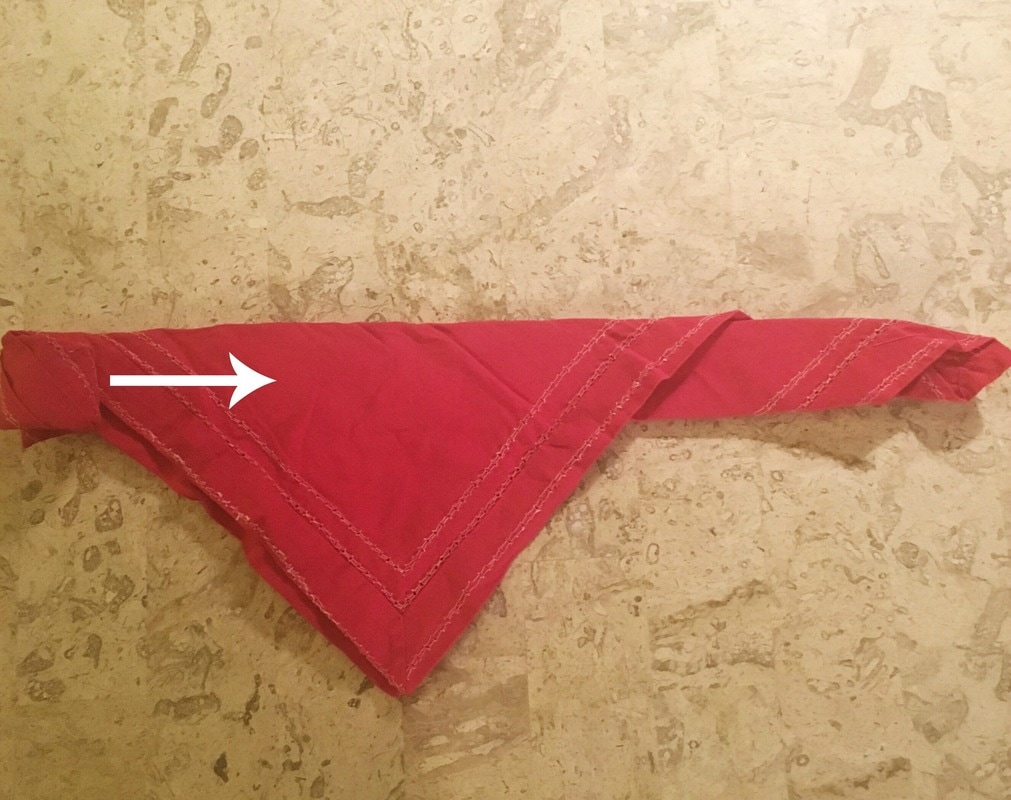
​Step 4:
Fold ½ of the kimono to the right. Fold both left and right sides together to make it look even.
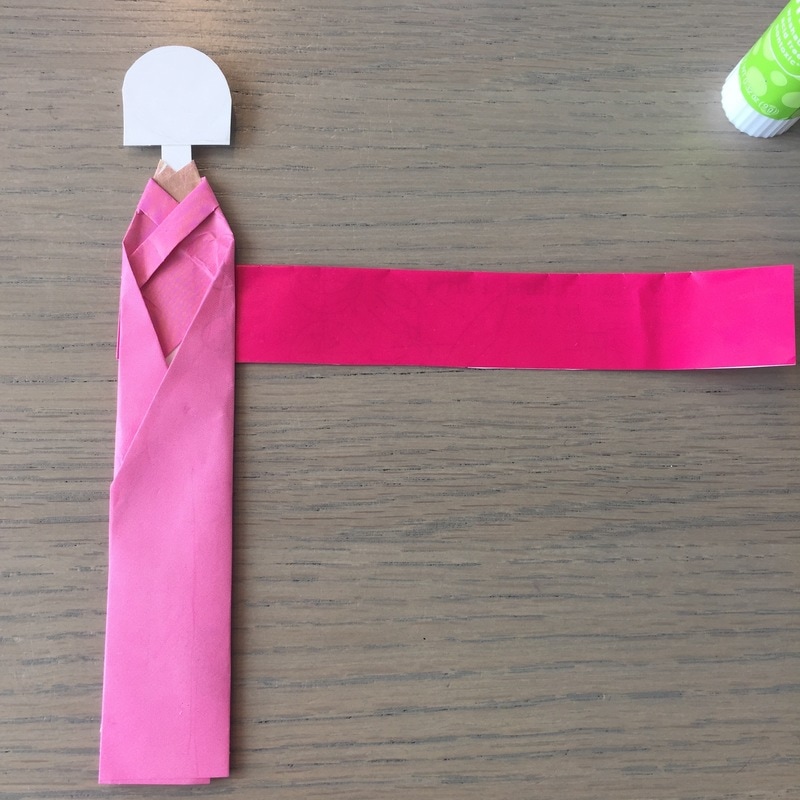
Picture
Picture

​Step 5
: Take another solid color origami paper and fold it from left to right (about 2cm). Put glue under it, seal it and cut the piece out with care. Now your obi’s ready!
Picture
Picture

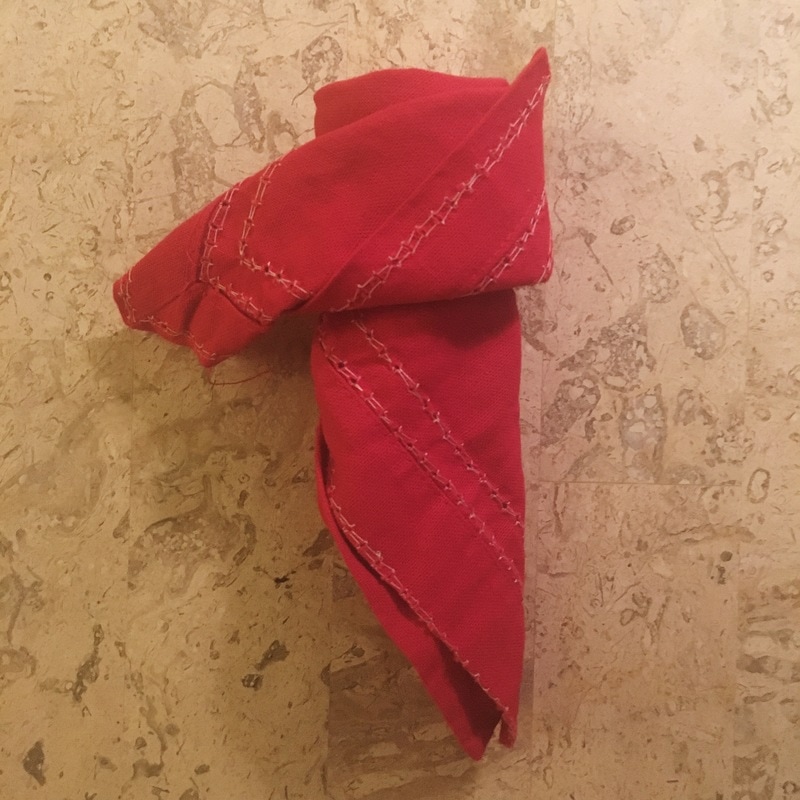
​Step 6:
Glue the obi to the back of the kimono, around the waist area. Roll it and glue it together at the back of the girl.
Picture
Picture
​
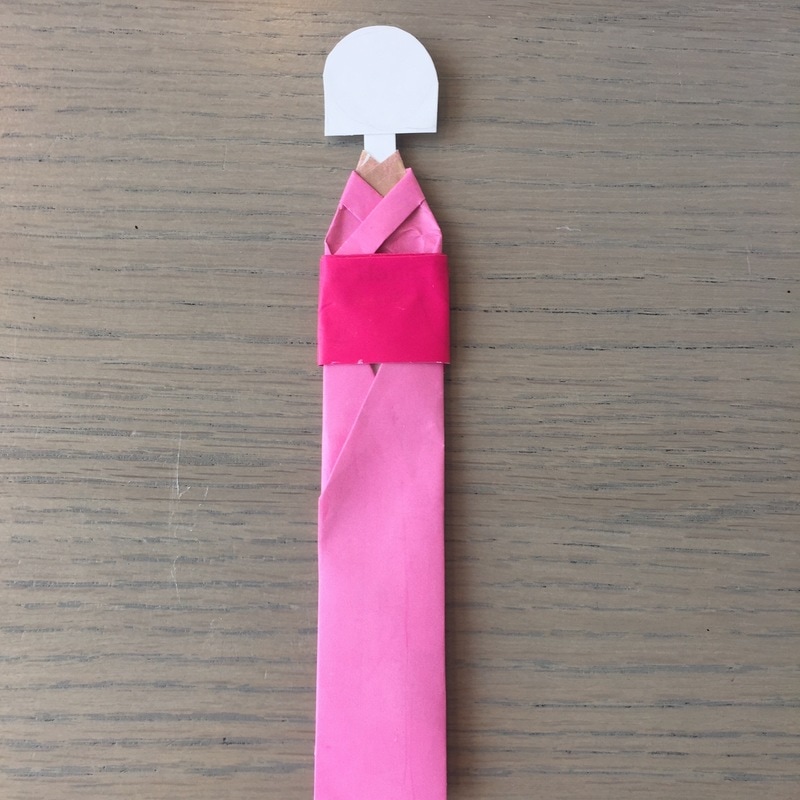
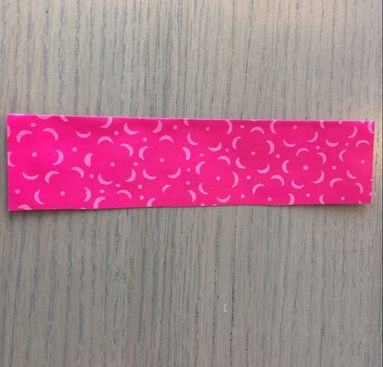
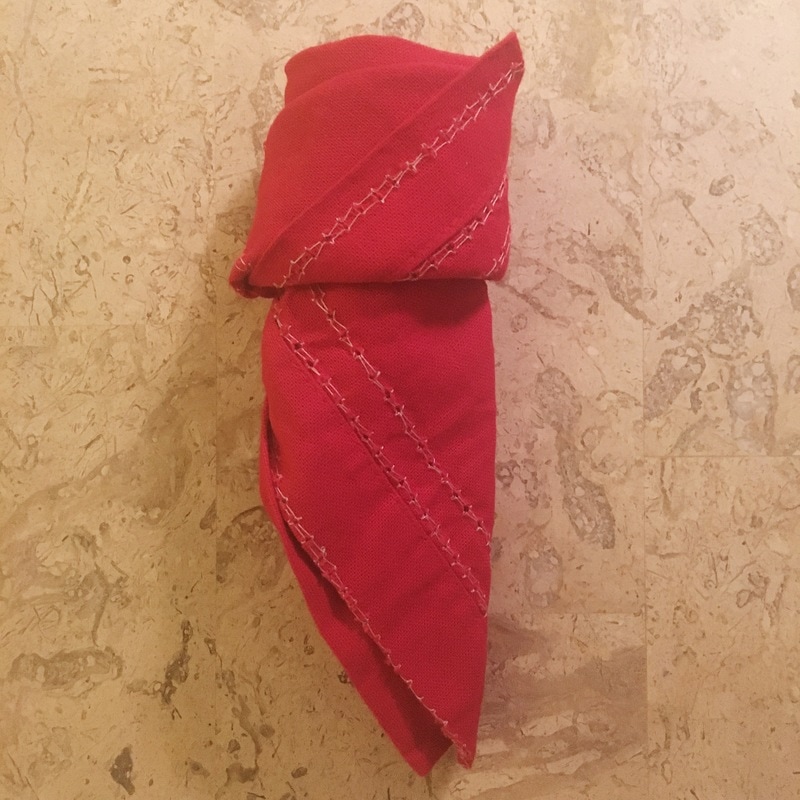
​Step 7:
Almost there! Now prepare the sleeve piece. Take a patterned origami paper and fold the top edge (about 2.5cm). Put some glue under it, fold it again and cut the piece out.
Picture
Picture

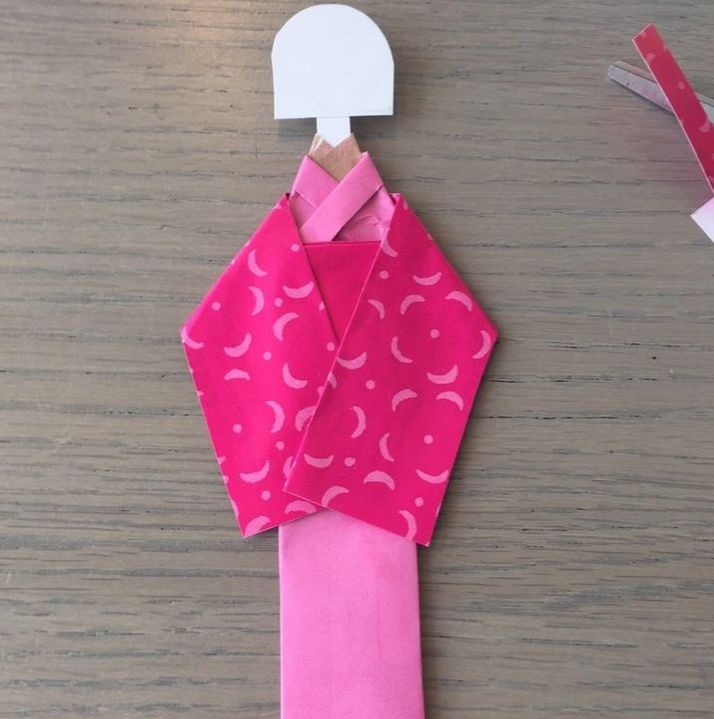
​Step 8: Place the sleeve piece on the back of the girl's shoulders about halfway, and fold the sleeves accordingly. Then glue into place.
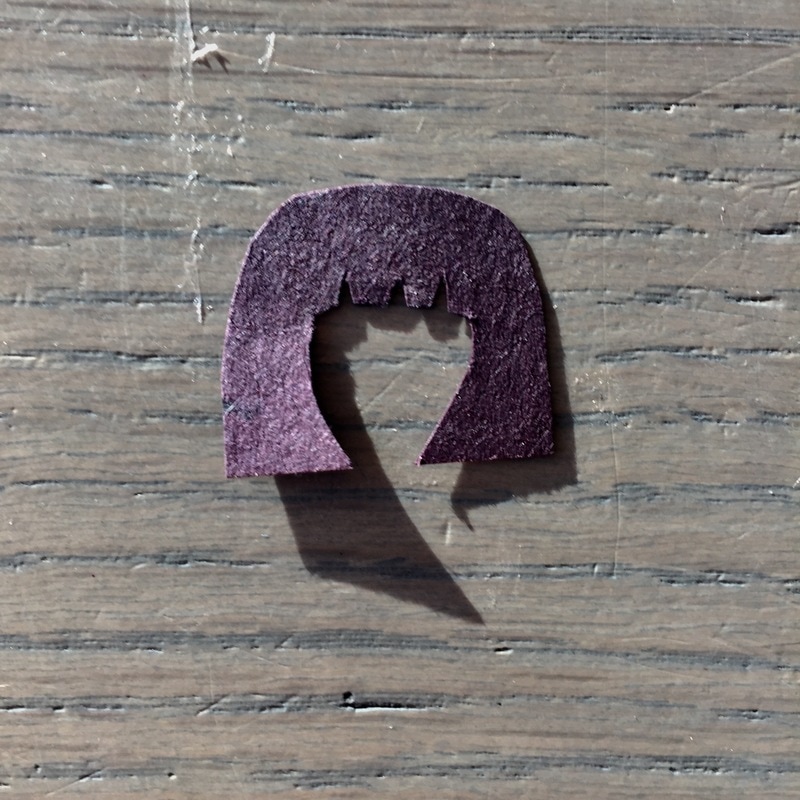
​(Optional) You could use a black cardstock paper and make a wig out of it, just like the one shown below.
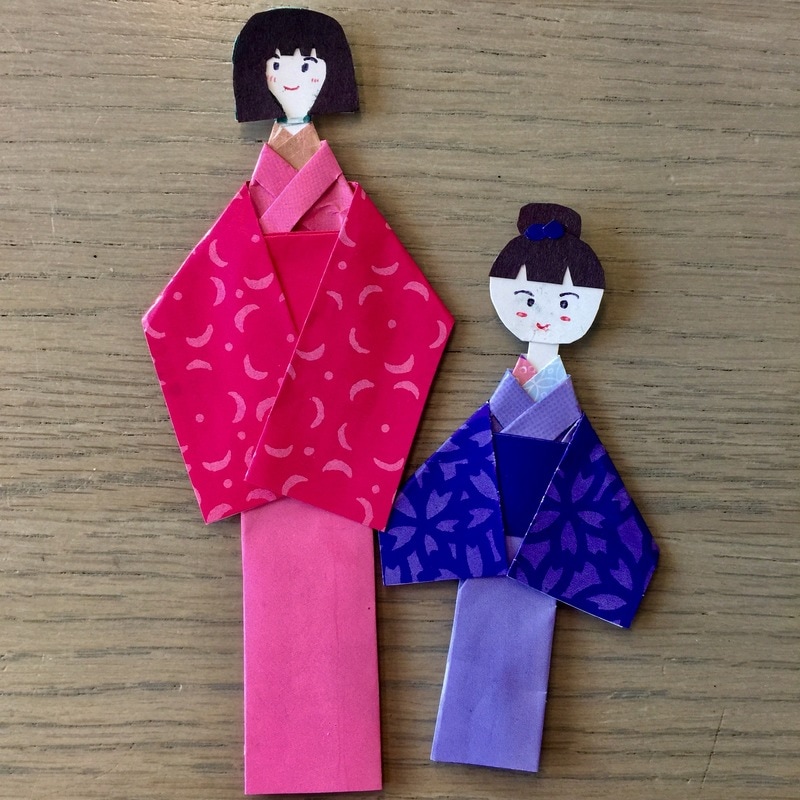
Picture
Picture

​Step 9
: Check your doll. Move anything into place as needed and allow her to dry completely. She’s now ready to be used as a decoration!
Picture

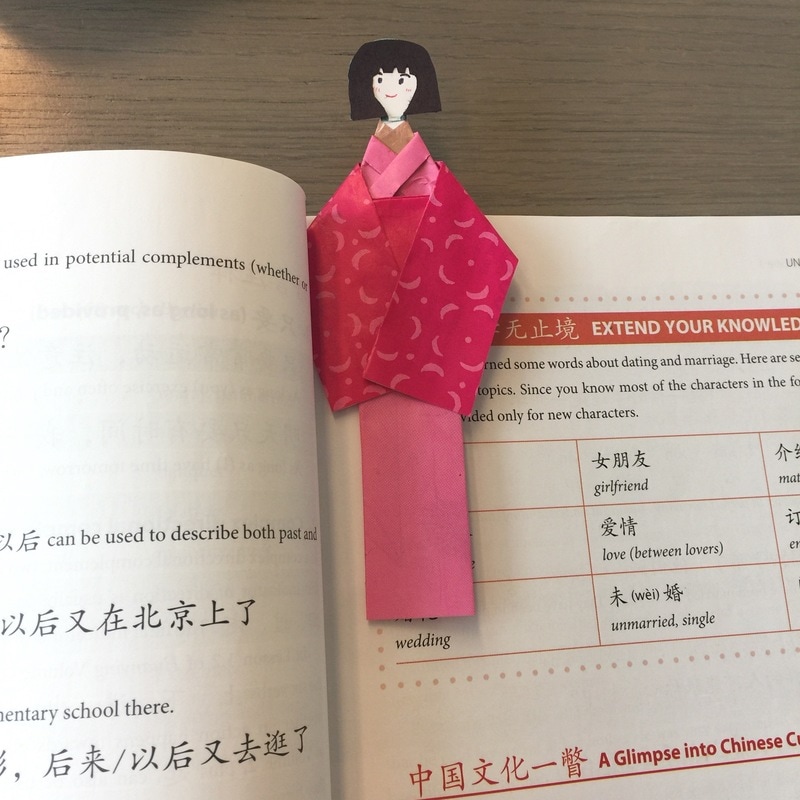
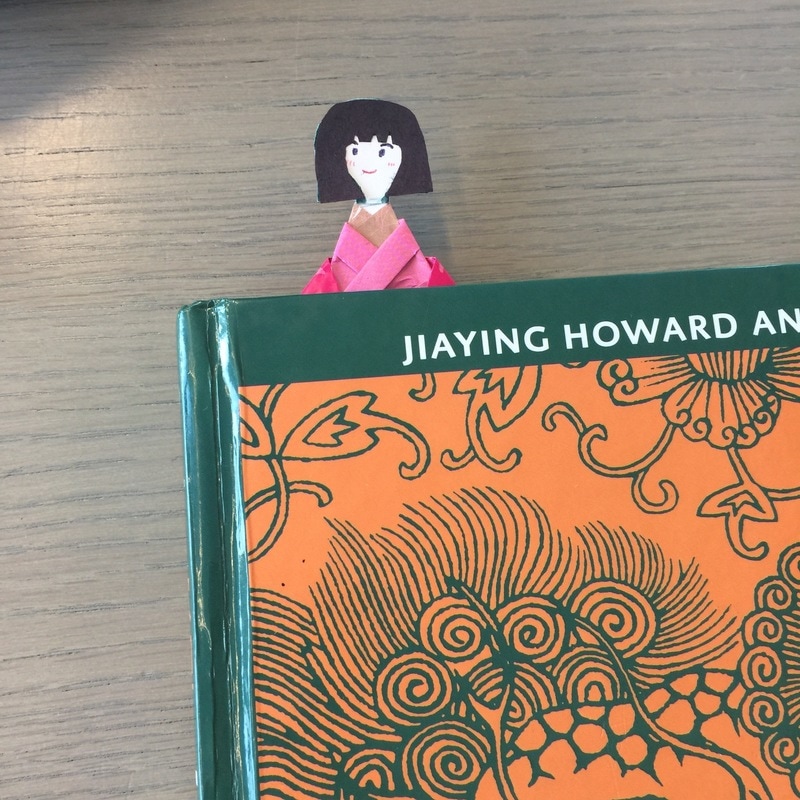
​In Use:
(Or as a bookmark!)
Picture
Picture

​That's it!
I hope you had fun making this simple and lovely Japanese paper doll from origami!
0 Comments

Bronzeville: Little Tokyo During World War II

6/29/2017

1 Comment

 
​By: Patty Hori, GVJCI-NCI Intern
Many Japanese Americans have grown up listening to the stories of their ancestors telling about their lives in the United States Government-run concentration camps during World War II, but what happened to the many Japan-towns along the west coast after Roosevelt signed Executive Order 9066?  Little Tokyo, Los Angeles did not just stop operating because Japanese Americans were forced out.  In fact, an entirely new culture arose during the three years in a town known as Bronzeville.

Incarceration and World War II occurred during the same time; with about 120,000 Japanese Americans evacuated from their homes, there was an enormous shortage of war-related industrial workers along the West Coast and many vacant apartments.  Since laws were passed prohibiting Japanese Americans to own property, the non-Japanese landowners needed a way to attract tenants into their once Japanese-dominated apartment complexes.  A meeting was held among the landowners of Little Tokyo and the initial idea was to open them up to Latin Americans, but before they began to execute their plan, a huge wave of Southern ("Bible Belt") African Americans migrated into an unsuspecting Little Tokyo.  Hearing of the Japanese incarceration in the West, African Americans envisioned this move as their opportunity to not only escape the cruel Jim Crow Laws dominating the South, but also to work in the factories abandoned by Japanese Americans.
​The influx of new African Americans did not occur without repercussions.  Prior to World War II, Little Tokyo housed about 30,000 people; after the signing of Executive Order 9066 nearly 80,000 people (majority African American and some Latin Americans) filled up these vacancies.  With nearly three-times as many people now living in the once Little Tokyo, it was plagued by overcrowding and as a result disease, more specifically communicable diseases. The once Japanese-run city morphed into a typical American urban neighborhood.  Every apartment was stuffed with families and living conditions deteriorated.
Parents worked long hours and children had to rely on older siblings and social welfare to take care of them after school.  Racially-based crime sky-rocketed as Los Angeles quickly became among the most diverse cities in America and as Los Angeles also became temporary stomping grounds for the many white servicemen defending the United States.  Misunderstandings arose and racially-charged young adults began to feud.  In the infamous Zoot Suit Riots in June 1943, African American 23 year-old Lewis W. Jackson, a young resident of Bronzeville was attacked by servicemen for wearing a zoot suit, which were wide-legged pants tightened at the ankle and a sleeved jacket down to their fingertips.  During this era, zoot suits became a symbol of rebellious youths among racial minorities.  Eventually, the Zoot Suit Riots led Mayor Fletcher Brown to call a unity meeting of Los Angeles.
However, many notable cultural shifts also occurred in Bronzeville.  World War II demanded industrial workers to work 24-hour shifts, which made Bronzeville a thriving hive of activity between the graveyard and day shifts.  Therefore, night life in Bronzeville became increasingly competitive with the long-established and already-famous clubs in downtown Los Angeles.  Many of the Bronzeville club owners found it profitable to remain open into the morning hours, which gave rise to the term Breakfast Clubs.  Breakfast Clubs in Bronzeville became hubs of African American music and culture and helped kick-start notable musician's careers.  Among the most famous clubs that had their roots in Bronzeville were Shepp's Playhouse, Finale Club, and the Cobra Room.  Breakfast Clubs had performances by famous musicians like Coleman Hawkins, T-Bone Walker, and Bronzeville's very own Charlie Parker; they even hosted A-list celebrities like Helen Humes, Julie Garland, and Gene Kelly.  Bronzeville demonstrated how much influence a group of people could have under shared passions and community. ​
Upon the release of Japanese Americans from incarceration camps, they came back to their former home to find it drastically different from how they left it.  As the war ended, industrial jobs were no longer needed and many African Americans found themselves unemployed, so many left to seek other career opportunities.  The returning Japanese Americans re-opened their shops and businesses and bought out Bronzeville business leases.  However, there were occasional instances where lawsuits ensued.  In the court case involving the Nishi Hongwanji, non-Japanese Buddhist Minister Julius Goldwater cared after the temple and rented it out to various institutions including a Baptist Church, but Nishi Hongwanji refused to renew leases after January 5, 1945.  In revolt, the Baptist Association sued the temple, but it was dismissed in September 1950.  Understandably, it was difficult for institutions to give up their land claims to a group whom they had no connection with; so even after the 'end' of Japanese American incarceration, our ancestors were not done fighting for their freedom.  Even today, Little Tokyo is under siege by corporate companies and franchises ready to buy out lands and alter the community feel of Little Tokyo.  We cannot allow our ancestors' hard fight to end just because they are no longer here.  Their spirit, determination, and need for change still remains within Little Tokyo and must be defended for decades to come.

Bronzeville
, Los Angeles was a brief three-year moment in history, but was filled with incredible stories about the harms of urbanization, its powerful influence in popular and musical culture, and the aftermath of World War II in Little Tokyo.  It's often a forgotten time in Los Angeles, but as Japanese Americans, we should not only remember the fight that occurred within the barbed wire fences of concentration camps or the literal battles on foreign soils, but also appreciate the non-Japanese minorities who brought their own unique cultures into Little Tokyo to influence a community that is truly Japanese American.

For more information, check out some of these awesome websites:
http://bronzeville-la.ltsc.org/  
​http://encyclopedia.densho.org/Little_Tokyo_/_Bronzeville,_Los_Angeles,_California/
http://www.npr.org/2017/02/19/516064700/how-little-tokyo-of-los-angeles-changed-into-bronzeville-and-back-again
1 Comment

Start a Budding Summer with a Blooming Rose Napkin

6/20/2017

0 Comments

 
By: Patty Hori, Megan Taenaka, and Lina Kwon, GVJCI Social Media and Community Outreach Interns
Picture
Hi everyone! Our latest blog post is perfect for your summer entertaining needs! These origami rose napkins are a simple way to add a beautiful pop of color to any table setting! Today, we think of origami as a way for young children to try and make cute little cranes (or "tsuru"), but origami has a much more interesting history than a toy for children.  While paper was invented in China around 105 A.D., in the 6th century, Japan took folding paper to a whole new level of beauty. However, paper was very expensive and therefore reserved only for the upper-class and origami became extremely elaborate.  This elaboration led artists to find ways to express themselves, and many found this expression in recreating the beautiful flowers around them, like roses.  Roses have their own unique meanings; according to the Japanese language of flowers, or hanakotoba.  Red roses (or "benibara")  represent love, while white roses (or "bara") represent devotion, innocence, and silence.  Additionally, pink roses (or "momoirobara") symbolize confidence, trust, and happiness.
All you need are square cloth napkins! Now, let's get started!

Step 1: Take your square cloth napkin and fold it diagonally into a triangle 
Picture
Step 2:  Fold the triangle up from the bottom.  The height of the rose depends on how big your fold is. (My fold was about 1 1/2 inches) 
Picture
Step 3: Continue to fold up until there is a smaller triangle left.  That triangle will end up being the leaves of the rose. The size and number of folds will determine how big your leaves are. (I folded mine three times)
Picture
Step 4: Flip the napkin over so the triangle is facing down.
Picture
Step 5: Roll the napkin from one side all the way until the other, and tuck the end into the roll. 
Picture
Picture
Picture
Step 6: Take the tail, and fold it over and around the rose to create the leaves.
Picture
Step 7: Your rose napkin has bloomed! 
Picture
0 Comments

    Archives

    September 2022
    August 2022
    June 2022
    August 2021
    June 2021
    February 2021
    November 2020
    September 2020
    June 2020
    April 2019
    March 2019
    February 2019
    November 2018
    July 2018
    December 2017
    September 2017
    August 2017
    July 2017
    June 2017
    May 2017
    April 2017
    March 2017
    December 2016

    Categories

    All
    DIY
    Food And Recipes
    JA Culture
    JA History
    Japanese Traditions

    RSS Feed

Come and visit!

ABOUT US

BOARD & STAFF

CAREERS

COVID-19

BLOG
​

​RESOURCES


TESTIMONIALS

UPCOMING EVENTS
​& PROGRAMS


TNK CLASSES

JAPANESE LANGUAGE SCHOOL
​

​JAPANESE LANGUAGE SCHOOL

HOW TO HELP

RESERVE OUR FACILITIES
​
VOLUNTEER


Contact Us

 1964 W. 162nd St., Gardena, CA, 90247  |     (310) 324-6611    |      info@jci-gardena.org
Office Hours: Mon - Fri 9 AM - 5 PM